Can DIY really have health benefits? Do it yourself projects have been gaining popularity in recent years. From home decor to house projects, people are opting for hands-on, self-sufficient methods over traditional services. The trend is not limited to personal interests and aesthetics, it has a profound impact on one's mental and physical well-being. This article will explore the health benefits of DIY and how it can help reduce anxiety and encourage personal growth by breaking out of your comfort zone. Which is exactly what happened to me!
Tackling Anxiety Issue
The biggest health benefit DIY helps with is anxiety. Anxiety is a common mental health issue affecting millions of people worldwide. It can cause feelings of restlessness, worry, and fear, which can be debilitating and affect daily life. Sometimes it affects us, and we don’t even realize it. Which was my case.
Engaging in DIY projects can help to alleviate anxiety by providing a sense of control and accomplishment. When we undertake a project, we have the power to create something with our own hands, and this sense of control can help reduce feelings of stress and anxiety. Additionally, the process of creating something new can serve as a distraction from worries, allowing us to focus on the task at hand and let our brains rest of other things in life for a moment.
Breaking Out of Comfort Zone
Breaking out of one’s comfort zone is an important aspect of personal growth and development. I think as we grow older this health benefit starts to dwindle down in importance. By trying new things and stepping outside our comfort zone, we expose ourselves to new experiences and perspectives. This can help us to develop new skills and challenge ourselves. These health benefits of DIY help us by pushing us beyond our comfort zone and encouraging us face new emotions and situations. For me, this meant learning to control my emotions better and negative thoughts.
Physical Health Benefits
In addition to reducing anxiety and promoting personal growth, DIY projects can also provide a variety of physical health benefits. For example, crafting activities such as knitting and crocheting can improve hand dexterity and fine motor skills. Building furniture or house projects, can provide a low-impact workout with the physical effort of carrying material and all the physical movements involved. DIY projects can also provide an escape from sedentary activities, such as sitting in front of a computer, allowing us to get up and move around while enjoying a creative outlet. I used to say DIY was my workout. While it does help with getting you up and moving, I wouldn’t say it has the same heart pumping affects as if you were to actually working out. Now I do squeeze in a quick workout, but working with tools and doing house projects is so good to get you moving.
Helps in Building a Sense of Community
DIY activities also provide an opportunity to connect with others and build a sense of community. Whether you are participating in a group DIY project or doing one yourself, once that project is finished, you are proud and want to share it. Every DIYer comes together and work towards a common goal. This sense of community can help to reduce feelings of isolation and loneliness, improving mental and emotional well-being. When I say I have online friends, I really mean it, I have online friends who love sharing in the same interest I do. It’s a great feeling and one of my favorite DIY health benefits.
Final Thoughts
Whether you're a seasoned DIY enthusiast or a beginner, taking on a new project can provide a sense of fulfillment. Which is a satisfaction that can positively impact your overall well-being and health benefits.
There is no denying the fact that the benefits of DIY activities go far beyond the physical outcome of the project. DIY tasks require problem-solving and creativity which nurture health benefits from different angles.
I hope you gained some insight from these DIY health benefits. If you are feeling the need of a mental health boost to reduce anxiety and promote personal growth, start a DIY project. If you have never started a DIY project, start with a small one. If you aren’t sure where or how to start, check out my learn how to DIY masterclass.
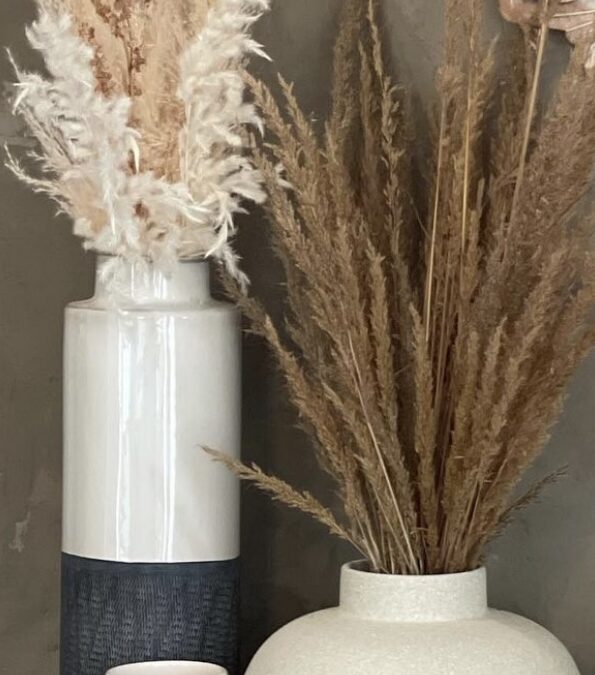
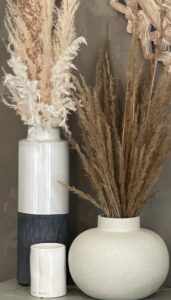
Bringing a bold color into your outdoor space is the perfect way to liven it up. So, I decided to paint my old ceramic pots for a spring refresh. I have had these outdoor ceramic planters for several years. I actually loved the worn, distressed look on them already. I know people are doing planter diy's to get this worn look. But they lived like that for a few years, and I was ready for a change!
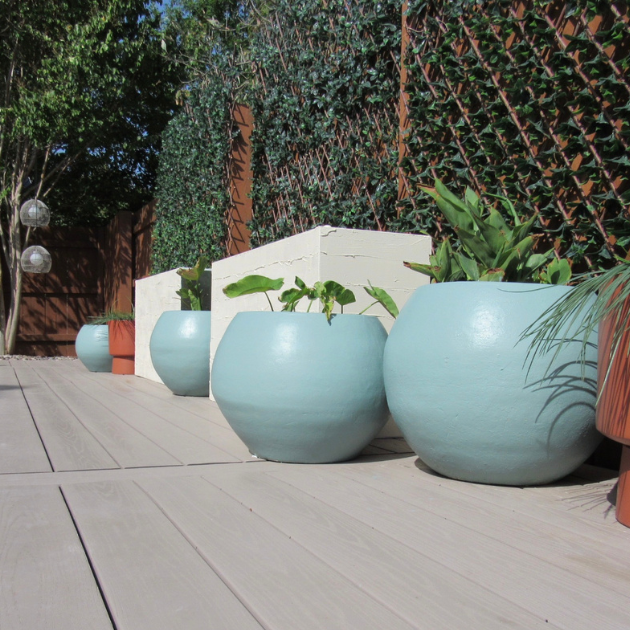
Sometimes painting can be scary, especially when it comes to a bold color. I was going to paint them a pretty soft white, but I am happy I went for it. I wanted a color that said “outdoor fun,” but was still relaxing, and I found that shade from Clare paint. It is the perfect combination of blue with a hint of green and a little gray called “make wave.” It turned out better than expected.
Update: A year later and I still love it and no chipping. It looks beautiful in front of my faux vine wall, and it complements the pool water perfectly.
Here are a few steps and tips on how to paint outdoor ceramic pots:
Remove old paint. Use a paint scraper to scrape the chipping paint off the ceramic pot. Don't use it to peel the paint off, you just want to get the areas that come off naturally as you go over it. Lightly scrape the pot until all the loose or cracked paint is off. If you have a clay or terracotta pot that is not painted, you can skip this part.
Sand the ceramic pots entirely. You can use an orbital sander (this is an inexpensive one I use and love) or do this by hand with a sand block or sandpaper. An orbital sander is not needed, it will speed up your sanding time though. Use a medium to fine grit sandpaper. I used 120 grit for the condition my ceramic pot was in. It wasn't too bad. The orbital sander worked great getting the edges flush where the chipped paint was. It will also help roughen up the ceramic surface just enough for the paint to adhere better, but not scratch it up.
before painting ceramic pot
My ceramic pots have a handmade look to them, they aren't perfectly round or smooth. So, I made this step a quick process as I wasn't trying to make my pots perfectly smooth. Take your time and really sand them evenly if they are in bad condition or if you want a perfect, clean finish for your ceramic pots.
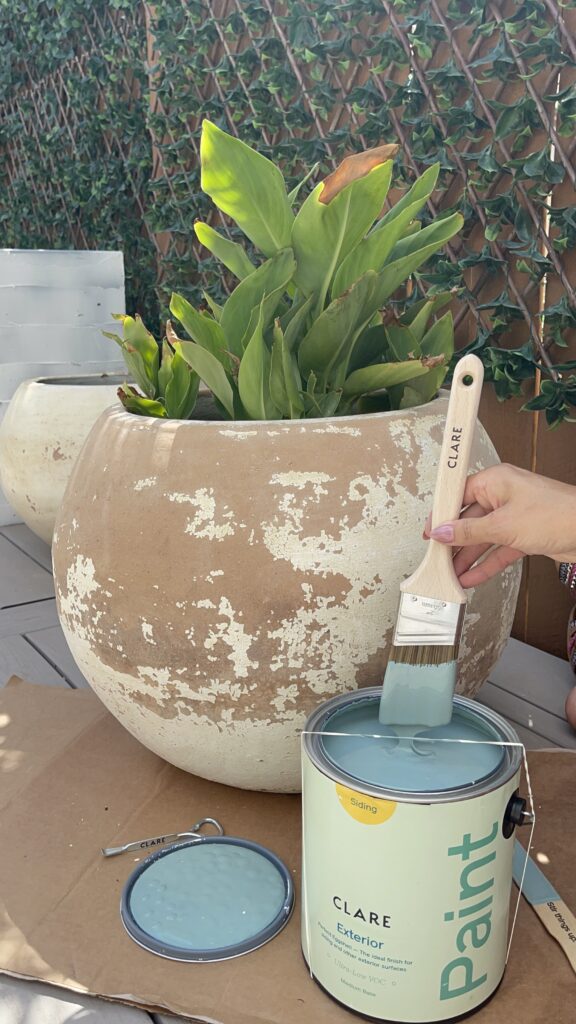
Paint your ceramic pots. It's important to use an exterior paint to last longer. Outdoor paint is designed to withstand harsh weather, so it's a better choice if buying paint for this project. To save money you can opt for interior paint and give your pot an extra layer of paint for protection. Primer before interior paint will help with the longevity and keep your painted ceramic pots looking newer longer. I used a paint brush since I was out of rollers. Painting with either one works great. Test them out and see which finish you like better.
What finish to use on your ceramic pots?
This is just preference. Some ceramic pots are extra glazed and shiny, the key to painting them is a good buff sand and the type of paint you use. If your paint is not sticking, try using a primer before or enamel paint (exterior paint). Here is the exterior paint I used “Make Wave” these designer colors are a little more on the expensive side. I think they are worth it for the right projects. I wish they made the exterior paint in a quart size, but for now it only comes by the gallon. They do have this exact same color in their interior line in a quart size if you wanted to save some money.
Think about the finish you want your ceramic pots to have once they are done. I was going for a little shine on mine, so I used the semi-gloss sheen. If you want less shine, go for eggshell or matte. I thought it would be pretty outside with the sun and water glistening off that shine.
Think about different designs
One design idea with these pots I had was to distress them with the blue, but after I painted them, I was in love and didn't want to do that. Plus, leaving them painted new brought a modern feel to the space and that's exactly what I was going for back here. It's always a mess with pool floats and kids forgetting to hang towels, so these beautiful painted ceramic pots give me happy feels during those times, ha ha!
For a video tutorial, I have one here on my YouTube video. If you decide to do this diy project, I hope this how to paint ceramic pots blog post was helpful and they turn out beautiful!
The paint in this diy project was used in an Instagram collaboration here. This post is not sponsored or affiliated with that collaboration. DIY Bloggers can earn money from ads and affiliate links. I do have some affiliate links throughout this diy project post and on my website. I earn a small commission from some purchases through those links. Cheers to design + diy and supporting small businesses. THANKS for being here. – Heather
If you are looking for a stylish and sophisticated accent wall, a concrete faux accent wall is a great design option. Its raw beauty brings such a unique feel to any space, and it goes with every interior design style. The faux concrete accent wall I did in my house created a beautiful backdrop for my entryway. Walking into that texture just never gets old. This is an inexpensive accent wall that will make a statement. It is cheaper than wood and wallpaper coming in at under $50, depending on how big your wall is.
I will take you through the exact process below that I used and show you step by step instructions. Plus, a couple things I did, that I would do differently!
Faux Concrete Accent Wall Material List:
Ardex Feather Finish – Cement Repair Mix
Mixing Bucket
Power Drill and Mixing Paddle
Or a large hand mixer for small to medium wall (what I used)
Floor Protector (or a couple of old towels)
Painters Tape
Large Drywall Tapping Knife (I prefer the plastic ones)
Mudpan (or save your plastic butter tub)a Mask (mixing is a little dusty)
Although I love the problem-solving aspect of DIY projects, I also love when my projects go as smooth as possible. So, my first tip is to mix a small batch of the Ardex mix and practice on a piece of scrap wood or cardboard box. This will give you the feel for using the product in general and in my opinion, make your faux concrete accent wall that much easier.
Prep
Prep your floor area and get everything ready. The concrete mix dries quickly, and it can be a bit messy. Lay down a floor paint protector or a few towels. I have tile so I used an old sheet folded in half and had no problems. Tape it down and tape off your baseboards.
Tape off your wall. Use painters' tape to line the outside of the wall just as you would if you are painting. Add another layer of tape or paint protection paper to cover more wall area. That is one thing I did not do, and the faux concrete got on the adjacent wall. You can easily wipe it off before it dries, and paint over the stain it leaves.
Mixing
Mix Your Ardex Concrete (don't miss important note below). Decide how much you will need for your wall and mix it with water. To figure this out, use the instructions on the box for the square footage and mixing ratio. The box says to mix 2 parts cement powder to 1 part water ratio. I like to use my handy red solo cup to measure this out. Don't be alarmed at how dark it is when it's mixed, it dries much lighter. This is a little dusty, so I like to wear a mask.
After I mix it, I typically add a couple extra splashes of water. I have used this product in a variety of applications, and I find it easier to spread, especially on the wall, when it is a little thinner than what the directions call.
Keep in mind, everything you use should be disposable or plan to rinse off as soon as you are finished. The faux concrete dries quickly and will ruin whatever it dries on. With this in mind also plan on doing this project all at once, you can't cover the product and come back to it an hour later.
To clean up: I wipe everything off with a paper towel to get most of the concrete off the tools and knife. Then, I rinse everything outside or in my sink if there is not a lot of residue left to go down the drain. Sometimes I will rinse it in a bowl and then pour the bowl in the trash.
Important Note. If you mix one batch of concrete and apply it to part of your wall. Then mix another batch and apply it to the rest of your wall. The colors could be slightly different gray variations. Some people like that look, if you do, have a plan on where you want each batch to go on the wall. If not, and you want a smoother look that is one color, mix what you need (or more) in one batch.
4.) Trowel on your concrete mix. It's time to rock and roll! If you have kids, put on a good movie because you don't want any interruptions. I like to start from the top and work my way down and out. If you want less texture, use a bigger knife. You don't want to leave too many marks as it will dry exactly how it looks wet. You will eventually get the technique down; it just takes the right amount of pressure while having a light hand.Since this is just for aesthetics, you only need a thin layer. Use just enough to cover the wall. You will need to work quickly since it dries quickly. Peel the painters tape off of the wall edges as soon as you are finished. Once it dries, you can lightly sand any imperfections or leave as is. If you need to hang any wall decor, just drill a tiny pilot hole first and go up in size until you reach your nail or anchor size. If you have been wanting to do a faux concrete accent wall in your house, I say go for it and enjoy the process. It is such a unique and fun wall; we always get compliments on it!