Faux vine walls are a beautiful and unique way to add a touch of nature to your home inside or outside. They can be used to create a variety of different looks. You can make your faux vine element lush and overgrown for a natural feel. Or create a more subtle and elegant one. I love the diamond pattern vine walls. And, best of all, they're relatively easy to create yourself and low maintenance being faux!
I actually fell in love with a faux vine diamond wall which started this entire project. I wanted to recreate it on my patio. A beautiful climbing vine adds visual interest to any space. We enjoy hanging out on our patio to watch movies or eat dinner. I didn't want to attract more bugs than we already get with a real vine wall.
Real climbing vines on your house don't always cause damage. It depends on what material the vine wall is climbing on and how much moisture it keeps. So, even though the risk is small for vine walls to damage your house, it was another reason to go faux!
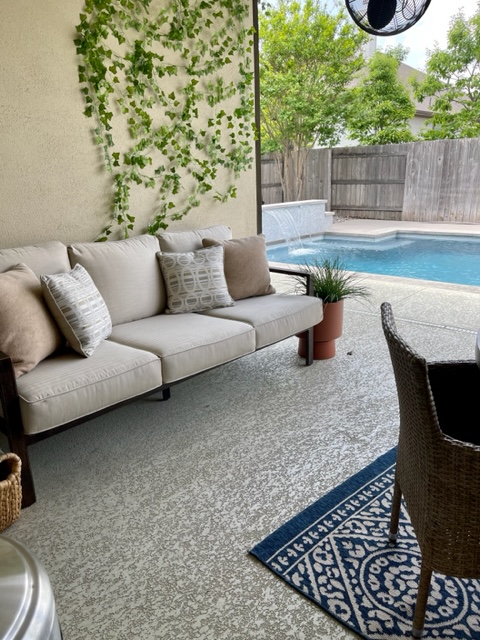
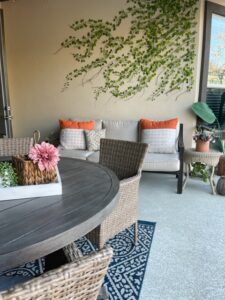
Plus, the wall I'll be doing this faux vine wall on is behind our outdoor couch. I didn't want to have to worry about watering over the couch or it dying and being ugly, ha!
I bought these faux vine strands. I attempted to create the diamond pattern, but I wasn't loving it out here. Once I started creating an organic look, it felt perfect for this space. I probably should have started from the bottom, but our couch is against the wall. So, I started from the top and I am in love with it.
You can't beat greenery all year round, which is the main reason I am obsessed with fake vines and plants outdoors here in Texas. I love my real plants, but honestly, I have a hard time keeping them alive outside.
How to attach faux vine to a wall
I planned to use screws and fishing line to create my faux vine wall. That was a failure! Stucco is really hard to drill into, and it was taking longer than I wanted this DIY project to take. When a project is meant to be simple and it's not, I always like to step back and reevaluate it. Sometimes my expectations are just off, and sometimes there is another way.
I got a few screws in the stucco and then realized how many holes I was going to have to create. Stucco is porous and if water gets behind it, that can cause mold problems. We have a pool back here, so that was not helping me with my mold anxiety, ha ha. There are preventative measures you can take, but that and how long it was taking me I opted for another way.
I left the screws I had in and filled them with a clear caulk sealant. I decided to try gluing them. I tried a couple glues, and it didn't work. Then I thought, what about a good old fashion glue gun?
I had won a professional glue gun on Instagram recently and thought it would be perfect to try holding these faux vines up. A professional glue gun is a little more expensive than your typical glue gun. Think of it as an industrial upgrade that heats at a higher temperature and bonds better for a stronger hold than crafting calls for. I am so thankful it worked and wish I had thought of it originally, ha ha. A DIY lesson learned, and that is ok.
No one wants a faux vine wall that looks fake. To make it look as natural as possible, I added the detail it needed. It's pretty close to us and I knew it would bother me if it didn't look somewhat authentic. I used real vine branches from my aunt's house. I hot glued those on as well. The faux vines I bought look like real english ivy, and it was perfect for this big blank wall out here.
As you can see from the in-progress stage, that it might look worse before it starts to look better. Just remember to keep your inspiration picture close by, that really helped with my confidence will creating this wall. It helped me see how a real vine wall grows to try and replicate it. Unfortunately, it just takes a little while for you to see that it is looking good. I actually thought this was going to be a flop until I got towards the end of the project. It's easy to pull off with the glue if you do mess up or end up wanting to change the layout of the vines.
Steps for hanging a faux vine wall:
have a couple “real vine wall inspo” pictures to look at while creating yours
cut your faux vine in 2-3 ft strips
start the vine without the branches first, put it in different directions like your inspo picture
glue every couple of leaves, but alternating sides
I added the branches towards the end of every other section
I even cut small leaves on a few strands to make it look real
glue the faux vine strand along the branches
professional glue guns get hotter than crafting guns, so be careful
have something to set your glue gun down on, so you don't ruin a pretty pillow like I did
Weatherproofing a faux outdoor vine:
This faux vine wall cost me about $15 and is under the roof on my patio porch. With a couple coats of outdoor sealant spray you can make any faux plants outdoor ready. If you plan to use a faux vine wall where there will be a lot of sun exposure, you can splurge and buy some that are made for outdoors OR spray them first with a clear coat sealant.
Anything that is made for outdoor UV protection will work. I would use one in a spray paint can. There are a few different sealant options you can use. I would use this one that is a matte finish. If you want the leaves to have more of a gloss, than you can use this one in a gloss finish.
Additional Faux Vine Wall Tips
Here are a few tips for making your faux vine wall look its best:
Use a variety of different types of vines to create a more interesting look.
Mix and match different colors and textures to add visual interest.
Hang the vines in a staggered pattern to create a more natural look.
Use a variety of different lengths of vines to add depth and dimension.
Trim the vines as needed to keep them looking neat and tidy.
faux vine wall supplies
Options for Hanging a Faux Vine Wall
professional glue gun
command hooks
nail and fishing wire
screws and zip ties
tacks
staple gun
So, if you are looking for a way to add a touch of nature to your home? Look no further than a faux vine wall! This easy DIY project is perfect for anyone who wants to add a little bit of whimsy and charm to their space.
Inside Faux Vine Wall Ideas
Use faux vines to create a trellis or archway.
Use faux vines to frame a mirror or painting.
Use faux vines to create a headboard for your bed.
Use faux vines to add a touch of whimsy to a child's room.
For more outdoor DIY inspo here is my faux outdoor vines I used to add some greenery to our fence and a little extra privacy. A quick close-up video here
My blog is supported by readers. As an Amazon Associate, I earn from qualifying purchases. As well as other affiliated links to products I use and love. If a post is sponsored, that will be disclosed within my post. Find me on YouTube or Instagram for more DIY behind the scenes.
If you want to learn how to DIY, check out my course “Dominate DIY” where we tackle ALL the beginner basics as a community, and I teach you how to bring those magazine pages to life in your home.
Faux Vines: A Beautiful and Low-Maintenance Way to Add Lush Greenery Around The House
Faux vines are a beautiful and low-maintenance way to create a beautiful garden feel, without all the upkeep. They can be used to cover up unsightly areas, create privacy screens, or simply add more greenery to your outdoor space.
There are many different types of faux vines available, so you can choose the perfect one for your needs. Some popular options include ivy, morning glory, and wisteria. Faux vines come in a variety of colors and sizes. You can use dark green or light green or both and mix it up to find one that matches your space.
They are lightweight and easy to hang or install. They can be attached to walls, fences, or pergolas with nails, screws, zip ties, command hooks, fishing wire, hot glue etc.
Another fun way to use faux vines is to create trellis or archway. I used expandable panels to help create a little extra privacy around our pool area. Here is my how-to youtube video on that.
Once installed, faux outdoor vines require little maintenance. They do not need to be watered or fertilized, and they are resistant to pests and diseases. I spray mine off at the start of spring from dust or debris left over from winter.
You can't beat greenery all year round, which is the main reason I am obsessed with fake vines and fake plants outdoors. Don't get me wrong, I am actually a plant lover and have tons of real plants inside. I love the convenience of faux plants outside with our brutal Texas heat each summer.
When we were discussing adding a fence topper for extra height on our fence, I thought of the idea of creating a faux outdoor vine wall instead. I created a beautiful climbing faux vine wall on my patio wall the year before. I used a different kind of vine, linked here. These are strands and not on a panel. I hot glued these to my stucco and glued some real vine twigs to give it an authentic feel. I even add a few pieces each year ha ha. So, I have experience with faux vines and thought of using the panels instead of more wood on my fence.
Can faux vines be used outdoors?
Yes, faux vines and plants can be used outdoors. Keep in mind, you will want to use fake ones that are made for outdoors though. If you use faux indoor plants outside, they will fade from the sun over time. I had a couple outdoors and they faded quickly in the back yard. That is where we get the harsher afternoon and evening sun. They lasted about a year. The ones I used in the front yard took a couple years to fade as they only saw the morning sun. I even painted one of them when it started fading, because I like to experiment and paint things lol. It looked good for another 3 months and then the rest of the faux plants faded, and I tossed them out.
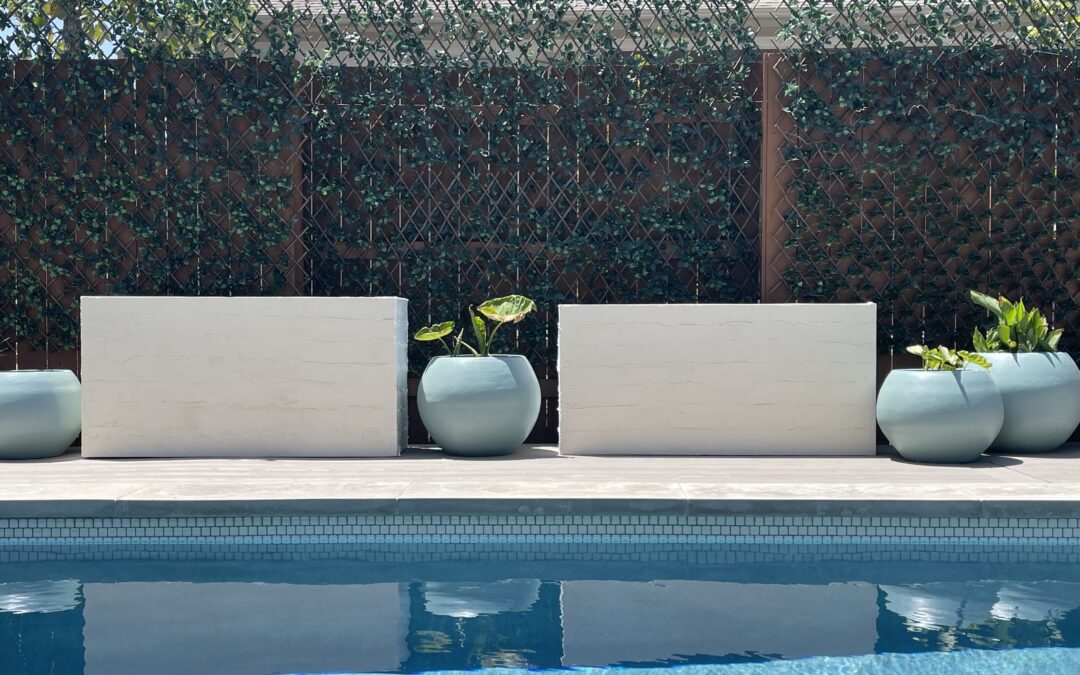
The faux vines panels give us a little extra privacy along the fence line from seeing eye to eye with our backdoor neighbors. We don't mind having neighbors or else we would move to the country, but we wanted a little distraction from staring right at them. Plus, the faux vine greenery was just what I needed back here for a modern touch.
Line your panels up before you screw them in to make sure they fit evenly. I wanted a certain height over the fence, so I started with my top panels and stretched them out the size of my fence section. You can have someone help hold your vine panels or use a screw to hold one side up like I did.
I drilled the screws in my fence as far as they would go WITHOUT going through the other side (my neighbor's side). Then I used the zip ties These outdoor panels are pretty light weight, but we get bursts of wind back here and I put enough screws that they were not going anywhere. I basically put them towards the ends and the middle and did another row towards the bottom.
I put the second row of faux vines on the bottom and made sure the lattice sections lined up nice and straight. If they are close together, you can't tell there are two panels. Here is a quick video for more of a visual on these faux outdoor vines. After all my panels were attached, I “fluffed” the faux vines and adjusted them a little.
I bought 6 faux vine panels for a total cost of about $250. The prices vary online for different vine options, but I bought these from Amazon. I originally bought 5 and realized I needed to double up along the fence line. So, I bought a 6th one and it was the wrong one, oops! The leaves looked so fake and horrible though. I still have that panel sitting in my garage actually! I love the leaves on the ones I ordered though. They are thick, look real and have held up so far in our Texas summers without fading.
Greenery adds a touch of luxury and elevates the overall appearance of any space. These faux vines are the focal point of my backyard and make a statement. It's an element we can enjoy all year long. I wanted these vine panels to not only be pretty to look at but be functional and add some height for extra privacy back here. We have had these over a year now and they have held up great.
My blog is supported by my readers (you) so thanks for being here. As an Amazon Associate, I earn from qualifying purchases. As well as other affiliated links to products I use and love.
How cute is this summer serving tray DIY? A small material list and minimal effort, but oh so cute! I am looking forward to serving up some fresh lemonade and watermelon spritzers on this tray come summer. Since I was thinking summer tray, out by the pool, I wanted a fun design for it. I was inspired by a beautiful designer pillow I really loved but wasn't in the mood to splurge on.
This is how it turned out. This tray DIY would be cute on a coffee or side table too. Use a paint color that goes in your space and you could have a cute living room piece. The pattern is eye catching and stylish.
They have some cheap trays at Amazon and TJMaxx. I used an old tray from a thrift store, I think it was $5.99. I like to recycle home decor when I can, and this one was collecting dust in my closet. Here is a similar serving tray style to mine. It comes in a set for pretty cheap and unfinished. You could grab them and make a few tray DIY's for around the house or for gifting.
For This Easy Summer Serving Tray DIY:
I used 1.88″ frog tape, scissors, a 1″ foam brush and a small thin paint brush. I used this moody blue as it matches different spaces in my home. So, if I wanted to move it from the patio it would match my decor inside.
I used two sizes of gaps to create my design. I did this by using the full width of the tape and then cutting the tape in half for skinnier sections, you see here. If you want to be precise, you can buy two different sizes of tape. I wasn't going for perfection. Place your full width center piece tape on the tray and work outwards. I placed my full width pieces apart about 2.75″ apart to each end. I went with a diagonal layout to my square tray. I think it added a designer touch.
Cut your skinny strips. Cut several pieces of the frog tape in half. I cut them a little longer than my tray. I wanted this to be an easy tray diy, so I just eyeballed mine. Typical around here. You can measure and mark with a pencil if that works better for you. I was going for a designer artisan look anyway. Then put them in between the full pieces.
Double check your layout. Set the tray on your table and step back to get a quick look from a far and if it looks good move on to the next step. If not, readjust it.
First, paint the foam brush strokes. If you want to test it first, you can always use a piece of scrap wood or paper and do that before applying it to your tray. Less paint is best to start out, so happy painting! Make sure to leave enough space in between the foam brush dabs for the next step. Which is to apply the skinny brush strokes. Here is a quick diy tray video for a visual.
Peel your tape off once you are finished painting using both brush sets. Make sure you do this before your paint dries so it doesn't come off with the tape.
Last apply a topcoat to your tray diy so it lasts longer. Topcoats are important to protect your design from chipping or wearing over time. You don't always need one, but I highly recommend one in most instances. I used this one since my tray will be on my back porch and we use it often. So, use one according to how you will use your tray.
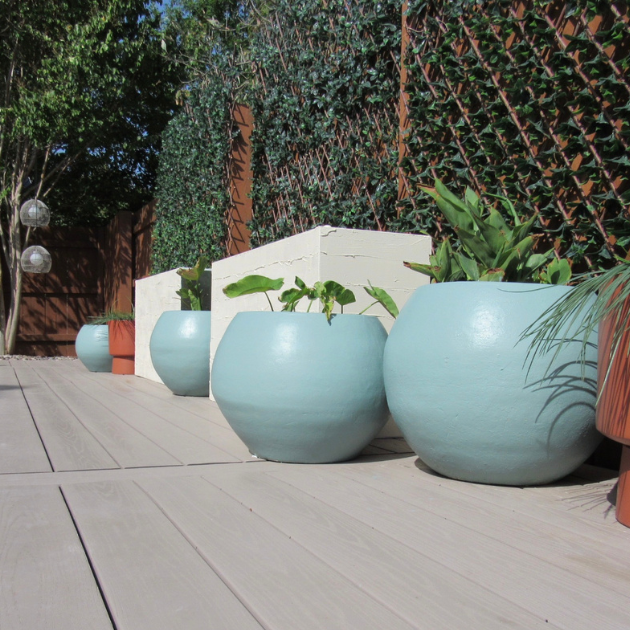
Bringing a bold color into your outdoor space is the perfect way to liven it up. So, I decided to paint my old ceramic pots for a spring refresh. I have had these outdoor ceramic planters for several years. I actually loved the worn, distressed look on them already. I know people are doing planter diy's to get this worn look. But they lived like that for a few years, and I was ready for a change!
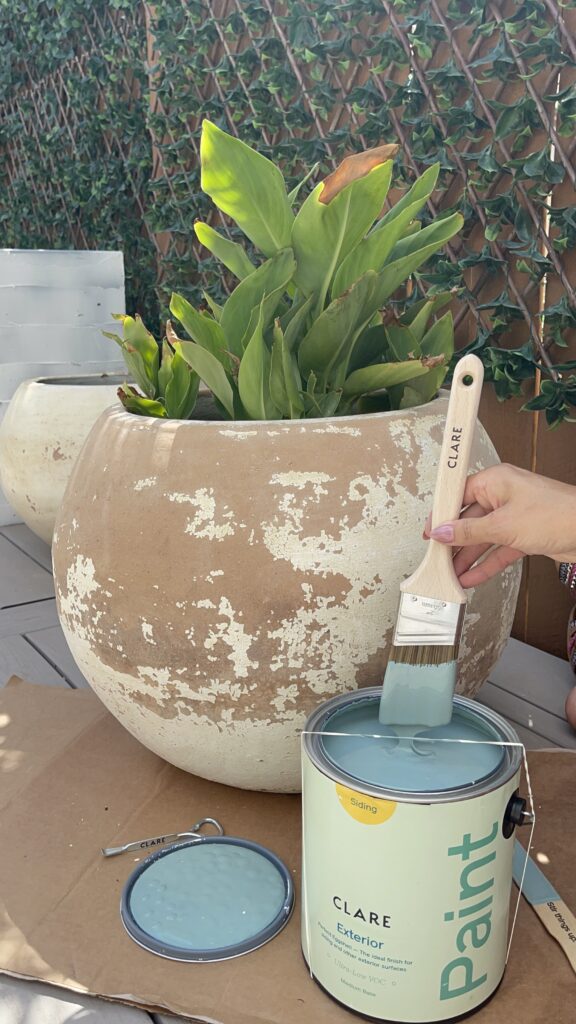
Sometimes painting can be scary, especially when it comes to a bold color. I was going to paint them a pretty soft white, but I am happy I went for it. I wanted a color that said “outdoor fun,” but was still relaxing, and I found that shade from Clare paint. It is the perfect combination of blue with a hint of green and a little gray called “make wave.” It turned out better than expected.
Update: A year later and I still love it and no chipping. It looks beautiful in front of my faux vine wall, and it complements the pool water perfectly.
Here are a few steps and tips on how to paint outdoor ceramic pots:
Remove old paint. Use a paint scraper to scrape the chipping paint off the ceramic pot. Don't use it to peel the paint off, you just want to get the areas that come off naturally as you go over it. Lightly scrape the pot until all the loose or cracked paint is off. If you have a clay or terracotta pot that is not painted, you can skip this part.
Sand the ceramic pots entirely. You can use an orbital sander (this is an inexpensive one I use and love) or do this by hand with a sand block or sandpaper. An orbital sander is not needed, it will speed up your sanding time though. Use a medium to fine grit sandpaper. I used 120 grit for the condition my ceramic pot was in. It wasn't too bad. The orbital sander worked great getting the edges flush where the chipped paint was. It will also help roughen up the ceramic surface just enough for the paint to adhere better, but not scratch it up.
before painting ceramic pot
My ceramic pots have a handmade look to them, they aren't perfectly round or smooth. So, I made this step a quick process as I wasn't trying to make my pots perfectly smooth. Take your time and really sand them evenly if they are in bad condition or if you want a perfect, clean finish for your ceramic pots.
Paint your ceramic pots. It's important to use an exterior paint to last longer. Outdoor paint is designed to withstand harsh weather, so it's a better choice if buying paint for this project. To save money you can opt for interior paint and give your pot an extra layer of paint for protection. Primer before interior paint will help with the longevity and keep your painted ceramic pots looking newer longer. I used a paint brush since I was out of rollers. Painting with either one works great. Test them out and see which finish you like better.
What finish to use on your ceramic pots?
This is just preference. Some ceramic pots are extra glazed and shiny, the key to painting them is a good buff sand and the type of paint you use. If your paint is not sticking, try using a primer before or enamel paint (exterior paint). Here is the exterior paint I used “Make Wave” these designer colors are a little more on the expensive side. I think they are worth it for the right projects. I wish they made the exterior paint in a quart size, but for now it only comes by the gallon. They do have this exact same color in their interior line in a quart size if you wanted to save some money.
Think about the finish you want your ceramic pots to have once they are done. I was going for a little shine on mine, so I used the semi-gloss sheen. If you want less shine, go for eggshell or matte. I thought it would be pretty outside with the sun and water glistening off that shine.
Think about different designs
One design idea with these pots I had was to distress them with the blue, but after I painted them, I was in love and didn't want to do that. Plus, leaving them painted new brought a modern feel to the space and that's exactly what I was going for back here. It's always a mess with pool floats and kids forgetting to hang towels, so these beautiful painted ceramic pots give me happy feels during those times, ha ha!
For a video tutorial, I have one here on my YouTube video. If you decide to do this diy project, I hope this how to paint ceramic pots blog post was helpful and they turn out beautiful!
The paint in this diy project was used in an Instagram collaboration here. This post is not sponsored or affiliated with that collaboration. DIY Bloggers can earn money from ads and affiliate links. I do have some affiliate links throughout this diy project post and on my website. I earn a small commission from some purchases through those links. Cheers to design + diy and supporting small businesses. THANKS for being here. – Heather

 Faux Vine Accent Wall Material List
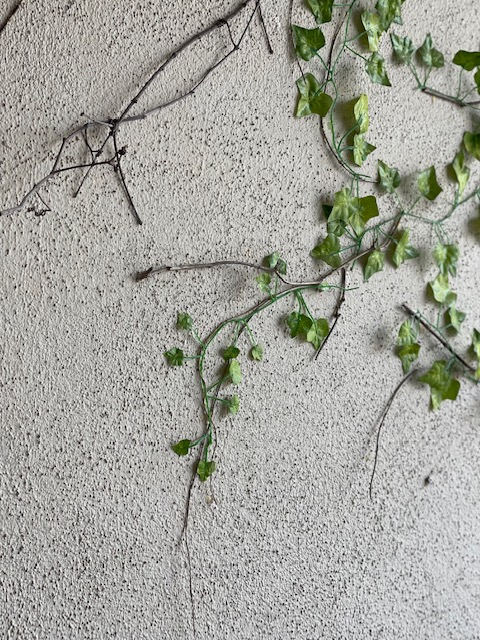 Steps for hanging a faux vine wall:
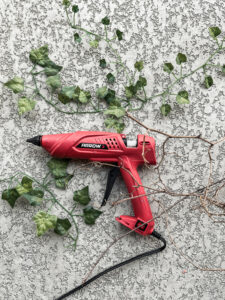
 When we were discussing adding a fence topper for extra height on our fence, I thought of the idea of creating a faux outdoor vine wall instead. I created a beautiful climbing faux vine wall on my patio wall the year before. I used a different kind of vine, linked here. These are strands and not on a panel. I hot glued these to my stucco and glued some real vine twigs to give it an authentic feel. I even add a few pieces each year ha ha. So, I have experience with faux vines and thought of using the panels instead of more wood on my fence.
 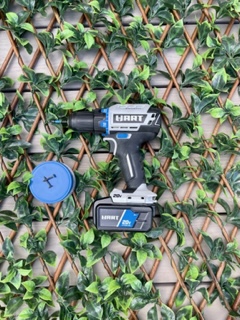 Supply List:
 I used two sizes of gaps to create my design. I did this by using the full width of the tape and then cutting the tape in half for skinnier sections, you see here. If you want to be precise, you can buy two different sizes of tape. I wasn't going for perfection.